Sunday, November 29, 2009

Roses

Lots of pictures I like. I took a lot too because I'm very harsh on my own pics. THe intention was for the DSP weekend challenge. First one is 50mm portrait. 2nd one is something you are thankful for. Being me, I always optimize. So, I'm thankful for these roses. And this will also go to portrait session because it is my portrait.


I love many of these pics. This one is showing my affection of the flowers.


One thing I noticed is I'm getting old. My face skin is not that firm anymore even with lots of sleep over the whole thanksgiving weekend. Can't pretend to be 17 like when I was 21. I really like my new hair style with a bow in the back.

Take away:
-portraits are the best with 50mm. Human look best with 50mm lens.
- tungsten light is very bad. Photoshop can whiten it pretty decently. Might be a bit yellowish still.
- RAW is useful when my lighting is not good. But during day-time with good soft light, I didn't have to do much changes to theses pics.
- camera can take RAW+L. It's quite useful. For that case, RAW is my backup. It's good for me so for the ones I want to adjust, I can edit their RAW. The rest I can just take the camera's JPEG if they are good enough.

Saturday, November 7, 2009

Color boosting, hair retouch, liquify


First pic is original
Second pic was sharpened using MCP action.
Third pic was more photoshoped based on saved jpg of second photo.

Third pics
=======
- Used Adjustment layer with color saturation, then used layer mask to erase the layer on humans. (so that we wont look reddish)
- My legs have hard flash hotspot. Just followed this tutorial for fixing it. Very good tutorial.
- hand painted with eye-drop color. Then reduce the opacity.
- Then layer mask /inverse layer mask for some adjustments.
- high pass the overlay mode of background copy. This will bring the texture of skin back.
- The frame is from MCP photoshop actions , free download.
- marque selected my top hair and painted red. I haven't learned eye drop tool, so I just chose red from color pallet, so it's not a good job. Should have done this, just like fixing flash hotspots:
- duplicate the background and work on it
- use eye dropper tool to pick nearby hair color. Then hand paint the top head on background copy
- reduce opacity to blend in.
- bring texture back by high pass filter on another duplicate background with overlay mode.
- layer mask or inverse layer mask to


Sunday, October 25, 2009

Removing unwanted objects


Removed the horns by marqueing the clean fence next to the horns. Copy and paste Ctrl+C, Ctrl+V => new layer with the selected fence only. Drag that selected fence and place it on top of the horns. Clean up a bit by layer mask or eraser.
(No clone tool. clone tool is messy)

Don't look at this post for color boost. See next post (Un and me on steps) for good method on color boosting. Color boosted, but don't remember how I did it. Not by LAB. Must be by saturation or adjustment layer overlay modes.

Metering off the palm

Grey card/palm Technique
===================
- Calibrate first, comparing the meter reading of the grey card v.s inner palm. See how much the exposure reading difference is. Remember this difference delta and use that delta for everytime from now on.

- Before taking a pic, go close to the subject. Read the meter off my inner palm. Adjust it to + 1 stop Exposure bias or whatever the golden delta is from calibration above.
- keep that setting, go back to the taking palce, recompose, and shoot. Don't meter off or adjust the exposure again once we step back to recompose!!


- Normal procedure w/o Palm.
- Metered off the cheek, set EB=0 (since I know the color is close to skin and no direct sunlight, so guess that 0EB might be ok. But don't know for sure. But turned out fine luckily for first shot)
- pretty good exposure.
- NO grey card or hand necessary since the color is close to skin tone and there are no tricky snow or black in the whole pic.
- regular metering off works.


- Put the hand as close as possible to the cheek, metered off the palm, set EB= +2/3
- not as good exposure. Darker. The normal one above has better exposure.


- Normal metering off the dark red point, adjust to get EB = 0
- pretty good exposure since there is no tricky colors in the whole pic


- metered off the palm which is placed next to the dark red point.
- set EB = +2/3
- too dark. Normal procedure above was better


If there are no tricky colors (dark or snow) in the overall image, normal procedure of metering off the object and setting EB~0 is fine. Better than palm method.

Let's test for tricky colors.

- metered off this white laptop. Since I know I should set positive EB for white objects, adjust EB = +1
- Not bad. But tricky because I cannot always use +1EB for white. What if it's in the sun or what if it's whiter like snow? I only know I should set some + EB, but dunno how much exactly. Can do trial and error, but using palm might help this time


- metered off the palm placed next the the white region. set EB = +2/3 ("golden delta")
- better than normal procedure above
- palm reading (aka grey card) helps tricky exposures


Let's test for another tricky exposure (aka black object)

- want to expose the black obj correctly
- first hand, exposed off the black and adjust for EB~-1 (since I know that I need -EB to have dark things dark , and +EB to get white things white)
- too over-exposed

- after seeing that -1EB is not enough, can take another one with -2EB to get the dark darker. THis is 'trial and error' with guesstimate. Let's use the palm/grey card.


- metering off the palm placed on the dark obj
- better exp than normal procedure
- and no need to guesstimate EB bias or trial and error


Conclusion
--------------
- grey card (aka palm method) helps for tricky exposures (snow or dark objects)

- for normal tones with nice lighting (in my room) , it's not necessary. Normal intuition with some intuitive adjustment to exposure bias in the head is good enough. We definitely need to think about that intuitive adjustment though. Can't always set EB=0. That's where grey cards are handy. Just use grey card or palm and set it to EB= 0 for grey card or EB= golden delta for palm. No need to calculate/guesstimate in the head for EB adjustments.

- If we are in the sun with lots of contrast, and direct sunlight, guesstimate needs too many trial and error.

- should I set palm offset to something other than +2/3 EB? Since all pics with my palm are too dark. Maybe I should set it to +1 EB

Sharpening in Photoshop


Ctrl + J to duplicate the background layer (just in case)

Filter -> sharpen -> unsharp mask (This will sharpen the whole image)
Amount as ~ 100%
Use small radius like 2 pixels
Leave the threshold as 0

NOw if I don't want the whole image to be sharpen, proceed with the following step for selective sharpening
- On that layer we just did unsharpen mask, create a layer mask.
- Then Ctrl + I to invert. The layer mask will be black. Black means the effect (of unsharpen mask) is not there. White layer mask means the effect is there. NOw with black layer mask, the image is back to the original blurred background because the blask mask hides the effect.
- X to change between black and white.
- Use white to selective have the effect on selective regions.
- use a paint brush and start painting the selective regions with white brush. Those regions will have the effect of 'unsharpen mask' we just did before. The rest will be the same as background.


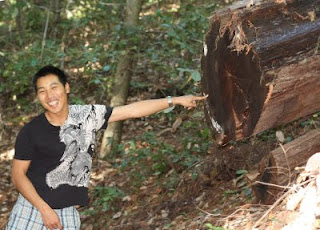
This technique was used on Un and the tree trunk on the image above. It sharpens his body that was blurred before.

Good tutorial on different ways of sharpening: http://www.youtube.com/watch?v=Dg8B5pcugvs

Sunday, September 13, 2009

Low Light test

- Goal: test if I can take decent pics in low-light room.
-There was only my night stand light while I take these pics.


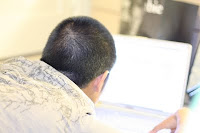
- spot-metered off Un's side face, +1EB (since I know it's dark and I want it brighter than 0EB setting, which would have been how I see with my eyes in the dark)
- The histogram has too much pixels on bright light due to reflection off the white wall.


- Now spot-metered off the white wall, knowing from the last image that the wall has more effect on the overall reflection. So I metered off it, +1EB (because I know that the room is still same dark) . +1EB as before, but now my meter should expose the wall well. It's a compromise between the overall disturbance of too-bright-wall but well-lit-face or correctly-exposed-wall but slightly darker face.
- I think second one is better for overall pic (according to histogram distribution)

Note; I tried to use rule of 1/3. His eyes and laptop should be at the joints.
Pics are blurry. I should have used tripod for better focus.

Saturday, September 12, 2009

What Exposure bias to use

Goal: To determine what exposure bias (EB) to use for shooting humans under the bright sun of the day

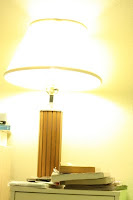
- Imitation of this problem => Goal: expose the books well (imaging them as human faces), and the light as the sun in the high sky.

Note: all pics today are with Tungsten White balance setting, manual mode and spot-metering.


Normal procedure we usually do:

- no flash
- spot-metering off the beige cover of the light stand.
- +1EB as it is white and should be white (so I expose more => +1)
- But the books are almost invisible (like dark human face under the sun)


- no flash, but now spot-metered off the books so that the books will have the +1EB exposure that I'll set

- the books are much better exposed then last pic, but they are still too dark


- diffused flashed added as fill-in flash to light the books (as suggested on many websites for fill-in flash)

- spot-metered off the books and set +1EB
- then recompose the frame, and shoot

- now the books are nicely exposed, but the background is too bright.

- Same dilemma as shooting people under high sun of the day.
-still don;'t know how to fix this.
- This book and light problem is worse because books and light are too close.


Take Away
- use spot-meter on the object that you want to have the correct exposure. That spot-metered object will be the only thing in the frame that will have the exposure you will pay attention to. The rest will be too bright or too dark or wrong, but that tiny point in the frame will have the setting you set to.
- recompose if necessary, but recomposing alters the just-set exposure from spot-metering, but shouldn't be too bad.


Test 2 of the Day

Goal: to determine what exposure bias (EB) to use

- EB = 0
- spot-metered of the black hair. Thinking that's the point among the whole frame where I want to have correct exposure reading.
- I was wrong
- it was too bright, hence the hair was not dark enough


- spot-metered off the black hair
- I want the black hair to be black in the pic, and from last pic it's too bright, so now I lowered EB=-1 to get the black darker
- black hair seems right now


Take Away
- If you want to expose dark things as dark, set EB to negative
- If you want to expose white things as white , set EB to positive
- Never spot-meter too white or too black objects as neutral EB=0. That is just wrong.


Test3 of the day

Goal: What EB to use for shooting bright light sources
Imagine: taking the bright sun on the sky with lots of clouds. To get the sun as an eclipse-looking ball, use the first pic "normal" techinque => under-expose

- 0EB
- too dark


- +1EB (since last pic was too under-exposed)
- still too dark


-spot-metered off the light ball
- +infinity EB (blinking needle on the far positive end)
- half-pressed the button to make the camera focus on the light ball, then drag /reframe it to sent to 1/3 then pressed the rest of the button
- maybe I should have had the light on the lower right corner


Take away
- To shoot the bright lights, always always over expose them (until after the meter needle was blinking off the chart on the positive side) . Because the light sources are very bright and you want them to be very bright. So need to over expose them very well.

Thursday, September 10, 2009

Metering Test on Self-portrait

Goal: self-portrait, hence, self-timer
Goal: Metering
For all these pics, I used a tripod. Tungsten WB. Flashed used with tissue.


- diffused flash with double-folded tissue
- spot-metered off this white laptop and adjusted the shutter speed to get +1 exposure bias.
- Aperture was set to F/11 so that I don't have to worry about blurring and focusing on wrong things. (See test 2 below for this).
- White laptop color is perfect. Nice exposure.


- Without Flash
- this is too dark and the color is too yellow from the low light.


- increased exposure bias to compensate for flash
- brighter , but still yellow from yellow room light and too dark in the room
- Increasing the exposure bias doesn't help to make the picture white.
- So use diffused flash from now on for all night shots or low light or indoor shots. That will make pics look like outside light.


Now I got metering. Time for me to step in after metering with a white reference is right.

- same settings as before
- spot- metered off white laptop, set to +1 EB and stepped in front of it.
-Not bad


This test is to verify that I can't meter off a background and use that setting on different background.
- spot-metered off the white laptop on a totally different background. Then moved the camera to have this frame, and lighting was different in those 2 backgronuds.
- Too exposed as expected.
- have to meter off the intended background. Can't meter off a white or skin-colored object against a different background and use that setting on another background.


- spot-metered on dark bag, and adjusted shutter speed until I get -2 exposure bias because I know that my face will be white once I stepped in and so I need to set the exposure down on the dark bag's reading.
- Viola! not bad at all. I'll call it good exposure.


Now, setting -2EB is something I don't usually do. So I'll forget. Let's use white obj to meter off because I just got that right in previous test.
- metered off a white laptop and set to +1 EB because I know from previous test that it'll expose the white laptop correctly. I also know that my skin won't be too far off from the laptop, so the exposure can't be too bad when I replace it with myself.
- I pressed the button, timing is counting. I replaced the white laptop with myself.
- Not bad. Good prediction/guesstimate. I've getting a grip on metering now.
- Color looks very similar to metering off the dark bag. How surprising that I got these right without needing to adjust the EB again once I calculated and set it to my estimate. My theory on metering is working. Re-read my thought process above on these 2 pics for this theory. I guess enough thinking is all I need so that I don't keep trying randomly.

- I can improve the color by metering off the obj with my skin color.
- I put the sofa with tan leather, metered off and set to get +1EB.
- replaced the sofa and (it doesn't matter if I remove the sofa before pressing the button or after)
- this is brighter
- 4sec compared to 2sec in previous pic.
- yellowish to my taste. Maybe my double-folded tissue was too thick. Should have tried removing one layer of tissue and see if it's whiter because of more flash light.

- Just to verify this above theory in setting to -2 off dark obj, now I set it to +1 bias metered off the same dark obj.
- Without me in the frame, this +1 would have been perfect on the dark bag.
- but with me, it's over exposed off my whiter skin than dark bag.


Take away from these two: metering off some objects on your behalf is tricky, especially if it's a dark object. Using white obj to meter off is much closer to normal process (setting to +1EV and shooting) . Best way, use an object same color as your skin to set the spot meter. Then just replace that obj with myself.

Self-portrait test is successful. I can take my own pics now. Recipe: spot-meter off a skin-color object in the place of the frame where I'll be after I jump in.


Test 2: Bokeh with self-timer
--------------------------------

Self-timer has focus problem. Once the shutter release button was pressed, the focus was set on the backdrop before I jumped in the frame. Then I became blurred even though I was much closer to the camera. I've tried not to move, and repeat this pic many time to have it focus on me once I jumped in the frame, but they all focus on the bag in the backdrop.

To verify this, I use Forever21 bag (so that there will be no question on motion blur). See the comparison. First pic is where I shoved the yellow bag (my behalf) in the frame while the 10 second is counting down. The focus was set on the blue back since the beginning, and the camera didn't refocus on closer yellow bag.

For second pic, I just left both bags where they are, and took with auto-focus. The camera focused on the nearer yellow bag, and now blue bag is blurred as it is supposed to be. Second picture is my goal, but I can't get it by stepping in the frame while the timer is counting down.

Therefore, I can't use self-timer to play with bokeh focus. I can't get my own self-portraits with Bokeh effect by using self-timer. The camera focus on whatever is there when the release button was pressed (10 second before it actually takes the picture) . 10 second timer doesn't refocus. Focus was set before the timer starts to count down.


Take away
1. Use Spot-metering with Manual
1.1. Metered off dark obj ==> set to
2. Always use diffused flash for all night-shots and indoor-shots with low light.
3. For self-portraits, use an object same color as your skin to set the spot meter. Then just replace that obj with myself.
4. Bokeh effect doesn't work with self-portraits unless the main focus (me) can be in the frame while the shutter button was pressed. Need remote release for this purpose.
5. have to meter off the intended background.
6. In pic properties in computer, exposure bias is always 0 for manual mode. Don't take that number as it's definitely not 0 as I set it to +1 for most of these pics. I need to write down that bias right after I take each pic. But for Av and Tv mode, the info has it right.
7. Double tissue was too thick. Use one layer of two-ply only.

Sunday, August 16, 2009

rule of third. Spot-metering
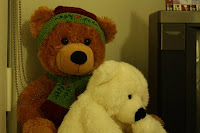
Main idea: - trying to apply rule of third on the bears' eyes. around midnight in my room with yellowish tungsten light.


-with AWB,
- Av
- no flash
- very bad


- changed to Tungsten light
- still in Av mode


- flash added without any tissue
- Changed to Manual
- 0 Ev exposure
- all points auto-focus
- set to spot-metering without know and without playing with it (so it must be metering off the center of the frame, which is the brown bear)
- white bear is pretty washed out (by flash and wrong spot-meter settings?)
- the color is better than without using flash. It's brighter. The previous pics without flash were too dark/yellow.


- I covered the flash with tissue paper.
- also realized that the camera was on spot-meter since the beginning of these tests, so switched to partial-metering and just shoot by framing (so the meter must be taking the center of the frame)

- it turned worse. THe color was very bad because the "averaging metering" is taking in many colors.
- meaning I should switch back to spot-metering, and pay more attention to metering and setting the metering right before framing the pic. This led to next image.


This one is so much better.
- changed back to spot-metering
- meter of the head of the white bear, and adjust the exposure at 0 Ev. (having the center of the frame at the head of white bear)
- then reframe and shoot. (now center is not at the head of the white bear)
- since the spot-metering of the head of white bear is correct, the color is good. Tissue paper effect is very good. The light is not too harsh. But the white bear is still washed out. So I need to adjust the exposure to either + or - some value to give it an offset instead of 0Ev.


This color is good. See now the white bear is not washed out, and his color is more distinguished from the curtain. And the whole picture is slightly warmer as result of + Ev bias.
* spot-metered of white bear's head with +5Ev. (one big bar up, half way through the positive side of exposure bar)

- But note that the brown bear is slightly out of focus. Not too bad if shallow depth of field was intended, then it'd be perfect. But this blur was not my intension. This pic was shot with all-point auto focus. So, I thought maybe I should single-point focus on the brown bear's eye. ... So in, next image, I chose the single-pt focus that lined up with the brown bear's eye (focus at the second column from right and the upper point in that column)


I love this last image. Good focus, good color, and my rule of third is not bad.

- manual
- spot-metered at the head of the while bear and adjusted it to +1 Ev or +5Ev? (some offset on + side, half way on the positive side of the exposure bar for sure)
- f/5.6 and adjusted the exposure to get +1 Ev
- Tungsten light setting
- single focus point on the eye of the brown bear. Now both bears are in focus.
- flash was used and a tissue paper was covered in front (this is such a big improvement that I covered the flash)


Take away from today: sport-meter of something with white color in the frame (e.g: white cloth) using the center point of the frame as the spot point, adjust the exposure to some + number, re-frame the objects so that center of the frame doesn't have to be pointing at the white object. After re-framing, we don't need to adjust the exposure again although it'll definitely be pointing at some other number now. In this last pic, as my frame is centering on brown bear, the exposure needle moved, but since i've already spot-metered of the while bear, it's okay to (At night, add the flash covered with a tissue paper before spot-metering off). Shoot.